Total Pageviews

Labels

Wednesday, 29 January 2020

Advent Yarn Project!

One of the things I was very excited about in the run up to Christmas 2019 was my advent yarn that I had purchased from Siobhan's Crafts! I've never had anything other than the usual choccy calendar, but I thought I was going to treat myself to something a little bit different! I had bought Siobhan's gorgeous hand dyed yarn before so when I saw she would be doing a 'mermaid and unicorn' themed yarn for this years advent yarn I couldn't wait. This was going to be a proper treat for me and quite frankly I ruddy deserved it!

So the box arrived in October which meant plenty of time to drive me mad while I wait to open them!


All the little packages were so prettily wrapped in their unicorn and mermaid paper so I strung them all up so we could look at them with excited faces until the 1st December.


By 'we', I meant me and the boy, my husband was strangely unexcited! He was even more unimpressed that I ate his chocolate advent calendar, but that is another story for another time! The dog was also excited but only because wrapping paper is currently one of his favourite meals.

So when it came to actually opening the packages, they really didn't disappoint and my son had the genuis idea to pin them back up once opened so we could admire them.


He is a protege in the making that one!


So what was I going to do with the yarn exactly?
For a yarn addict this really isn't important but I had a few ideas. I had originally planned to crochet something with them each day in the run up to Christmas, probably some squares to make into a throw, bunting or Christmas tree skirt. To be honest nothing was decided and I was enjoying just looking at them so that was that.


So then Christmas was over and then I had a plan. I've really been enjoying corner to corner crochet recently. It is such a simple stitch and can show off variegated yarn so beautifully. so I thought the yarn would look perfect crocheted into little C2C squares so I gave one a go..


The yarn was so delicious to work with. although, to be fair, I still had no actual clue what to do at the end but carried on making as I was enjoying it so much, after all isn't that what crochet is all about!

There wasn't enough for a blanket, a tree skirt meant I couldn't use it for another year. Bunting? Hmm, nowhere really big enough in my house to display it all together and it would be a crime to split them up.

So after staring at a blank piece of wall, wondering how dull my house looks with all my lovely Christmas decorations put away I decided I would make the most awesome, bright, clashing and completely mad wall hanging.

So the plan was to make the 24 little C2C squares 8 by 8, then sew them together 8 by 3 which makes quite a sizable wall hanging. 

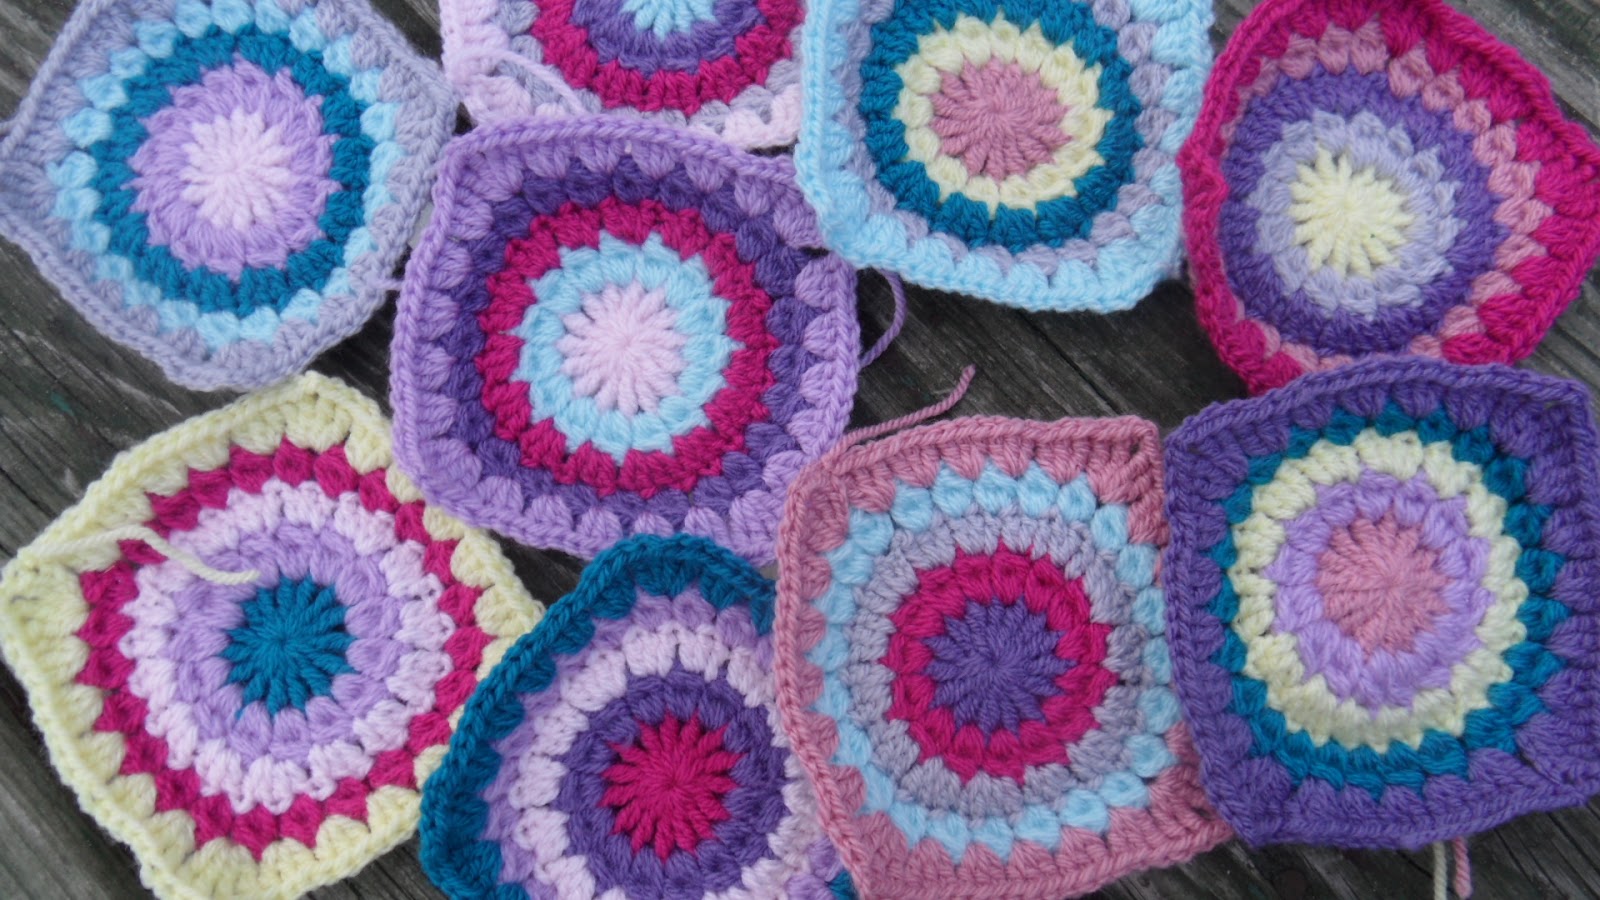
Here is a selection of the lovely little squares before I sewed them together..


I sent the husband off to look for a wooden dowel, put it all together and here we go!


I absolutely love it and it is such a talking point. I do love how you can create such unique pieces with crochet. And its it not like I ever thought I really need a brightly coloured wall hanging, it was just all organic off the back of 'what the heck can I do with these gorgeous mini skeins!'

So I am now looking forward to next Christmas's advent yarn offering, and in the meantime, I am going to order some skeins in my favourite colours, which at the moment is pretty much all of them!

If you want to view and order some of Siobhan's gorgeous yarns you can, via her website here

Happy Hooking!
Kelly@lovedotty


© All images belong to Kelly of lovedotty unless otherwise stated. Please link to pictures, content or DIY's if used on your own website. Crochet patterns are written by Kelly of lovedotty unless otherwise stated, please link to original post if used on your own website. Feel free to sell the finished product that has been created from the pattern, if sold via a website, please link to lovedotty blogspot. However please do not publish patterns in full or as your own, unless agreed by Kelly of lovedotty  

Sunday, 8 December 2019

Pattern - Christmas Star Bunting

I have whipped this Christmas Star Bunting for my fireplace for this year. We had a new lick of paint so I needed new bunting to compliment it, any excuse really!

There are really quick and easy to make so you could easily hook up a set for this Christmas, or maybe several? The addition of the sparkly tassels really gives it a luxury Christmas feel!


Pattern in UK Terminology

Hook - 3.5mm


Yarn
Yarn A - Cotton DK Weight in various colours that you wish (I used Stylecraft Cotton DK Classique in Shell Pink, Fondant, Sky Blue, Peppermint, Lavender, Mauve and Fuchsia) 
Yarn B - Cotton DK Weight in White
Yarn C - DMC Lumina Metallic Thread in Silver

Special Stitches
tr2tog - treble crochet 2 stitches together
tr3tog - treble crochet 3 stitches together
dc-spike - spike stitch using dc, worked in row below current row  being worked
Please see my stitch guide for a explanation on how to work these stitches if required

Star
Make 7, 
With Yarn A make a magic ring and work first round into ring (alternatively you can make ch2 and then work into the 2nd chain)


Round 1 - Ch2, tr2tog (this counts as 1 st), *ch3, tr3tog*, repeat from * to * 3 times, ch3, join with a sl st to top of beginning tr2tog (5 sts)

Fasten off and join any Yarn B to any ch3 sp of previous round

Round 2 - Ch1 (does not count as a st), *1 dc into ch3 sp, 1 dc-spike, 1 dc in same sp, 1 dc into top of next tr3tog*, repeat from * to * 4 times and join with a sl st into top of first dc (20 sts)

Round 3 - sl st into next st (should be top of a dc-spike from previous round), *ch5, work 1 dc in second ch from hook, 1 htr in next ch, 1 tr in next ch, 1 dtr in last ch, sl st into top of next dc-spike*, repeat from * to * 4 times, join with a sl st in st where first ch5 was made (20 sts)

Fasten off and weave in ends

Tassels
Make 8,
Using Yarn A and Yarn C, make your tassels, using twice as much white as silver with the silver used last so it is on the top of the tassels

Making Up
With Yarn C ch40, 1 dc into the top of a tassel, ch20, dc into the top of any of the 5 points of a star, continue to with the rest of the stars and tassels, working ch40 at the end

Happy Hooking!
Kelly@lovedotty

© All images belong to Kelly of lovedotty unless otherwise stated. Please link to pictures, content or DIY's if used on your own website. Crochet patterns are written by Kelly of lovedotty unless otherwise stated, please link to original post if used on your own website. Feel free to sell the finished product that has been created from the pattern, if sold via a website, please link to lovedotty blogspot. However please do not publish patterns in full or as your own, unless agreed by Kelly of lovedotty  

Tuesday, 19 November 2019

Pattern - Mini Christmas Bauble Bunting

Here is a super quick and easy pattern for making Mini Christmas Bauble Bunting
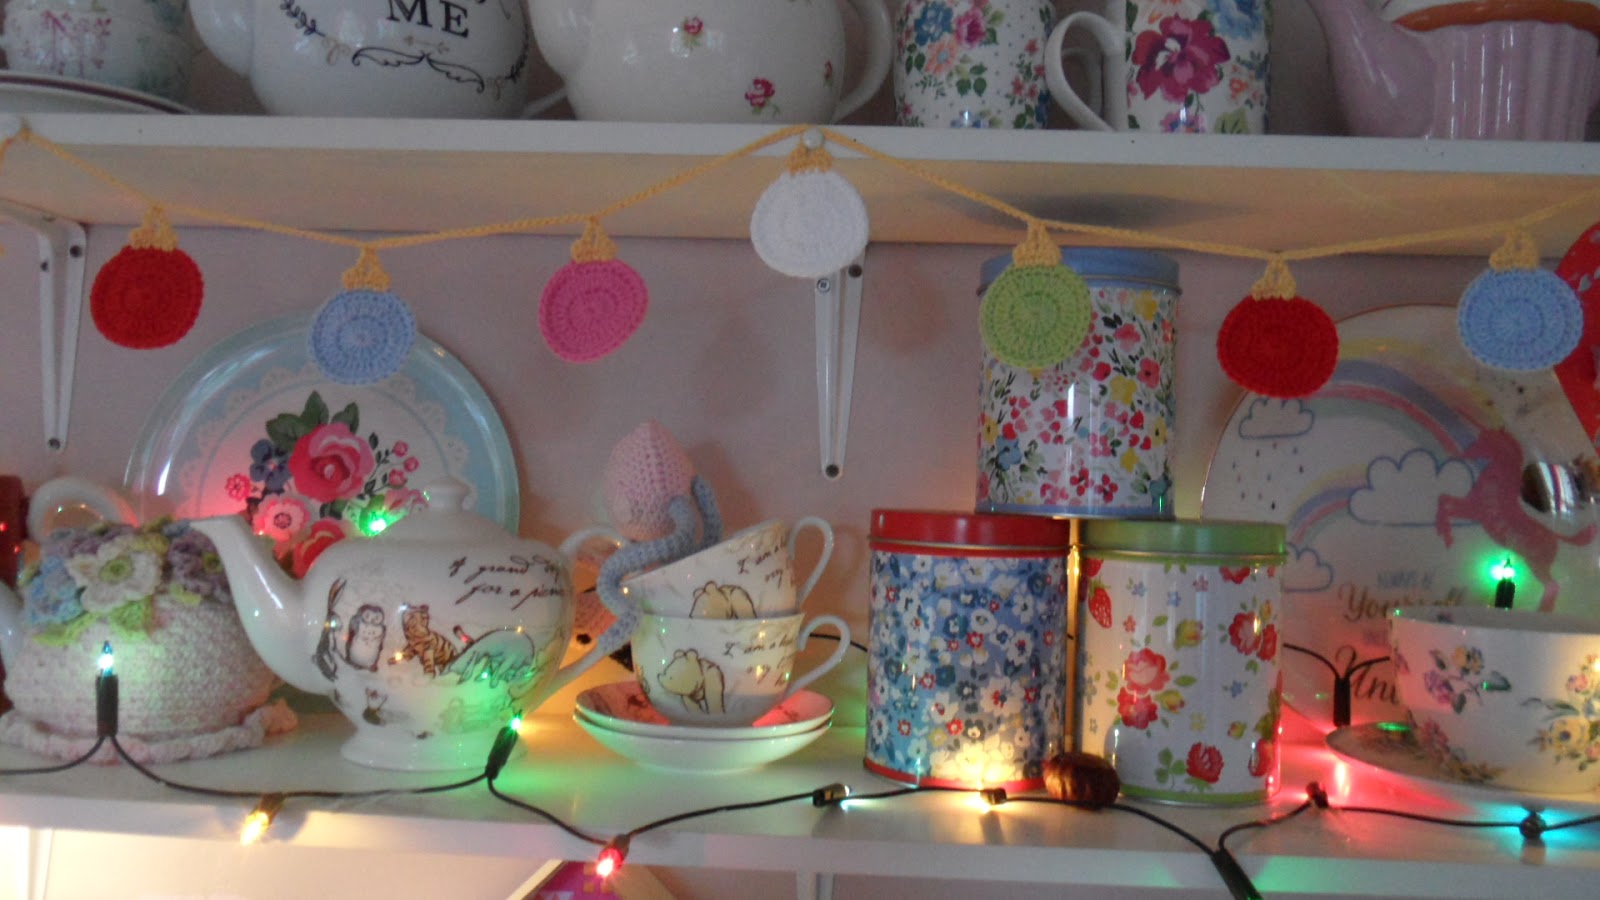
I made these last year in colours to match my kitchen and they looked so cute I wanted to keep them up all year! 
I have also used the crochet bauble to embellish gift tags, there is probably loads of other uses, cards, hanging decorations etc..


Pattern in UK Terminology

Hook - 3.5mm


Yarn - Cotton DK Weight (I used Stylecraft Cotton DK Classique)

Yarn A - A selection of Sky Blue, Fondant, White, Poppy and Soft Lime
Yarn B - Sunflower

Bauble

Make 15, 3 in each colour
With Yarn A make a magic ring and work first round into ring (alternatively you can make ch2 and then work into the 2nd chain)
Round 1 - Ch3 (counts as st throughout pattern), 14 tr into the ring, join with a sl st into 3rd ch of starting ch3 (15 sts)
Round 2 - Ch3, 1 tr in same st, 2 tr in each st around to end, join with a sl st into 3rd ch of starting ch3 (30 sts)
Round 3 - Ch1 (does not count as st throughout pattern), 1 dc in same st and in each st around to end, join with a sl st into first dc (30 sts)
Fasten off and weave in ends

Top of Bauble
Join Yarn B to any dc from previous round on WS of bauble
Row 1 - Ch1, 1 dc in same st, 1 dc in next 3 sts, turn (4 sts)
Row 2 - Ch1, 1 dc in same st, 1 dc in next st, ch5, 1 dc in last 2 sts (4 sts)
Fasten off and weave in ends


Making Up
With Yarn B make Ch20, *work the next ch through the ch5 top on the top of the bauble, ch20* and repeat from * to * until you have connected all baubles ensuring you have worked another ch20 at the end.
Fasten off

Here is my bunting strung up on my kitchen shelves last Christmas. It will be there again, pride of place this year!


Happy Hooking (and Christmas!)
Kelly@lovedotty

© All images belong to Kelly of lovedotty unless otherwise stated. Please link to pictures, content or DIY's if used on your own website. Crochet patterns are written by Kelly of lovedotty unless otherwise stated, please link to original post if used on your own website. Feel free to sell the finished product that has been created from the pattern, if sold via a website, please link to lovedotty blogspot. However please do not publish patterns in full or as your own, unless agreed by Kelly of lovedotty  

Thursday, 24 October 2019

Misty Vintage Patch Blanket


Wow my Sunshine Vintage Patch Blanket has proven to be really popular!

Click here to see the original blog post and tutorial!

It is such a fun blanket to make and because of the repetitiveness works up relatively quickly, so with this in mind I decided to make another! My best friend was planning on moving into a new home so seemed like the perfect house warming gift and also a chance to to try the blanket in a whole new colour palette.


So first up was choosing a colour palette, and this is what I chose, all in Stylecraft Special DK again:-

Patches were made up of Lemon 1020, Raspberry 1023, Soft Peach 1240, Pale Rose 1080, Sherbert 1034, Wisteria 1432, Parma Violet 1724, Violet 1277 and 1708 Petrol. 

Joining yarn was Silver 1203.

So I made all the patches using the same methods in my tutorial of making each round one at a time which ensures all colours are used evenly and no patch is the same! Don't they look yummy!


Once all the patches (99 in all, same as before), are made and blocked the fun bit of joining commences..

This is also the bit where you see whether you have picked the right joining colour or not! Turned out I was very happy with my choice. The patches are made up of very vibrant happy colours and the silver yarn accentuates that beautifully..

And then ta-dah!


So I have named this one the 'Misty Vintage Patch Blanket' for now and I think I love them both the same!

Happy Hooking!
Kelly@lovedotty


© All images belong to Kelly of lovedotty unless otherwise stated. Please link to pictures, content or DIY's if used on your own website. Crochet patterns are written by Kelly of lovedotty unless otherwise stated, please link to original post if used on your own website. Feel free to sell the finished product that has been created from the pattern, if sold via a website, please link to lovedotty blogspot. However please do not publish patterns in full or as your own, unless agreed by Kelly of lovedotty.

Thursday, 10 October 2019

Pattern - Mini Flowers


Pattern in UK Terminology

Hook - 4.5mm

Yarn - Cotton DK Weight (I used Stylecraft Cotton DK Classique)
Yarn A - Sunflower, Yarn B - Selection of White, Shell Pink, Sky Blue, Fondant and Greek Blue

With Yarn A make a magic ring and work first round into ring (alternatively you can make 2 chain and then work into the 2nd chain)
Round 1 - 1 ch (does not count as st), 10 dc, join with a sl st into first dc (10 sts)
Change to Yarn B
Round 2 - *2 ch, 2 tr into same st, 2 tr into next st, 2 ch, sl st into bottom of same st, sl st into next st*, repeat from * to * to end making 5 petals with the last sl st being made in the first st of the round (30 sts)
Fasten off and sew in ends.

© All images belong to Kelly of lovedotty unless otherwise stated. Please link to pictures, content or DIY's if used on your own website. Crochet patterns are written by Kelly of lovedotty unless otherwise stated, please link to original post if used on your own website. Feel free to sell the finished product that has been created from the pattern, if sold via a website, please link to lovedotty blogspot. However please do not publish patterns in full or as your own, unless agreed by Kelly.

Friday, 20 September 2019

Pattern - Mini Donuts

As a nice little accompaniment to my Donut Cushion Pattern I have designed these little mini donuts! You can use them for keyrings or bagcharms, make them into a necklace, or some bunting, or just have some dotted around the house for decoration. 

Lets face it, something as cute as these just have to be made even if they will serve no useful purpose! Add a face or keep them plain, up to you!


UK Terminology

Hook - 3.5mm

Yarn - Stylecraft Classique Cotton

Yarn A - 1 Ball of any colour of choice for the top of the donuts. For the donuts in the pictures I used (clockwise) Shell Pink, Wisteria, Tropical Jade (unfortunately discontinued)  Hot Pink and Sky Blue

Yarn B - 1 Ball of Wheat

Decoration - oddments of different colours of yarn, any colours of your choice

Face & Cheeks (optional) - oddments of black yarn for the eyes and mouth and Fucshia for the cheeks

Finished donut should measure 5cm (2 inches) across.


This mini donut is made in the amigurumi style, so it is worked a continuous spiral with no need to join at the end of each round. It may be helpful to use a stitch marker to mark the last stitch of each round, moving up to the next round as you work.

With yarn A, make 12 ch and join with a sl st in the first ch
Round 1 - 1 ch (does not count as st), 1 dc in each ch to end (12 sts)
Round 2 - *2 dc in first st, 1 dc in next st*, repeat * to * 6 times (18 sts)
Round 3 - *2 dc in first st, 1 dc in next 2 sts*, repeat * to * 6 times (24 sts)
Round 4 - *2 dc in first st, 1 dc in next 3 sts*, repeat * to * 6 times (30 sts)
Round 5 - *2 dc in first st, 1 dc in next 4 sts*, repeat * to * 6 times (36 sts)
Round 6 - 1 dc in each st to end (36 sts)

Change to Yarn B
Round 7 - Repeat Round 6 (36 sts)
Round 8 - *2 dctog, 1 dc in next 4 sts*, repeat * to * 6 times (30 sts)
Round 9 - *2 dctog, 1 dc in next 3 sts*, repeat * to * 6 times (24 sts)
Round 10 - *2 dctog, 1 dc in next 2 sts*, repeat * to * 6 times (18 sts)
Round 11 - *2 dctog, 1 dc in next st*, repeat * to * 6 times (12 sts)
Round 12 - Repeat Round 6 (12 sts)

Using a whip stitch and with the RS facing, sew together Round 1 and 12 to approximately a third of the way round.

Stuff the donut as much as you can using toy stuffing

Continue sewing and stuffing as you go along, when you finish, fasten off and sew in ends.


Sprinkles
Using different oddments of yarn in your choice of colours, sew random sprinkles over the coloured part of the donut. 
Depending on your preference you can embroider the sprinkles either before you sew and stuff or after. I find embroidering after is much easier and I have a picture tutorial on my blog to help, just click here to view!
Use the pictures as a guide and go nuts!

Face (optional)
Using the pictures as a guide, sew eyes, mouth and little rosy cheeks!


© All images belong to Kelly of lovedotty unless otherwise stated. Please link to pictures, content or DIY's if used on your own website. Crochet patterns are written by Kelly of lovedotty unless otherwise stated, please link to original post if used on your own website. Feel free to sell the finished product that has been created from the pattern, if sold via a website, please link to lovedotty blogspot. However please do not publish patterns in full or as your own, unless agreed by Kelly of lovedotty

Tutorial - Embroidering Pre-Stuffed Crochet

So for this tutorial we will be looking at embroidering onto crochet items post stuffing and sewing up. It is a much easier way of doing it and much better to sew onto the finished piece where you can see the size and positioning, than onto an item 'pre-stuffing' where you are not quite sure if it will end up exactly where you want! Because I am pretty useless at sewing (despite my desperation to be a sewing queen!) I have always struggled with this bit, so when I discovered this way of doing it was a relief!

For this tutorial I will be showing how I embroidered the sprinkles onto my mini donuts, however the principle is the same whatever you are embroidering and this will give the basic idea.

So here we go...
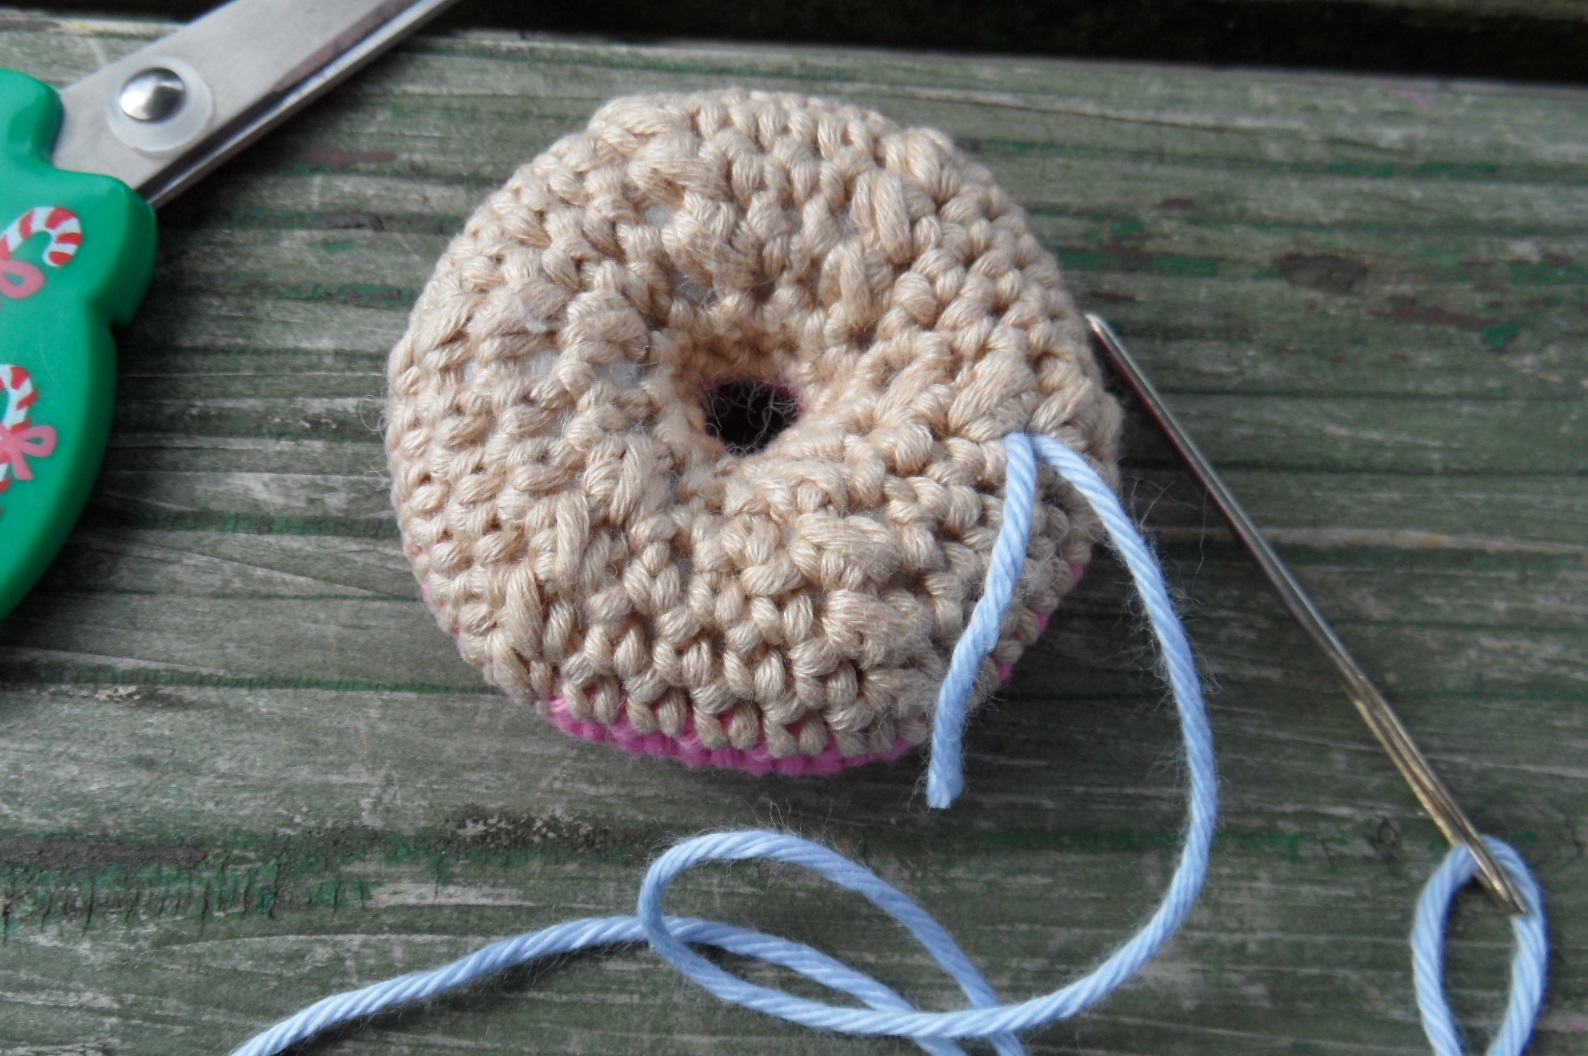
Cut a piece of yarn long enough to do all the embroidery required. So for my piece I am going to embroider blue sprinkles onto my pink mini donut..

Thread the yarn onto a wool needle. Decide where on the piece you will be beginning your embroidering and insert the needle into the bottom of the piece near to where you are beginning..

Pull the needle all the way through to the top of piece, coming out of the area where you will be beginning your embroidery..

Pull the yarn through until you leave a little tail on the bottom half, enough to be able to tie into a knot later. You will need to either secure this or hold it so it doesn't pull through when you begin your embroidery..

Begin working your embroidery as required. For my sprinkles, I made lots of random lines across the top of the donut..

When you have finished embroidering, on your last stitch, you need to insert the needle all the way through the piece and out of the same hole on the bottom you worked the first stitch into, where the tail should still be..

Pull the yarn through and your should be left with two ends of yarn poking out of the same hole..

Cut the yarn and then tie both pieces together into a knot and pull firmly to secure, keep an eye that you don't pull too tight in case it pulls at the embroidery you have just completed..

Cut the tails so you are just left with the knotted bit..

Using the end of your needle or a crochet hook, push the knot all the way inside of the piece until you cannot see it anymore..

Then, ta-dah! We are complete, you can't see any ends and no-one would even know!

Repeat as required, as I did with my finished donut!

I hope this made sense and you find it useful! If you fancy trying out your skills, you can use them on my FREE Mini Donut pattern on my blog!

Happy hooking!
Kelly@lovedotty


© All images belong to Kelly of lovedotty unless otherwise stated. Please link to pictures, content or DIY's if used on your own website. Crochet patterns are written by Kelly of lovedotty unless otherwise stated, please link to original post if used on your own website. Feel free to sell the finished product that has been created from the pattern, if sold via a website, please link to lovedotty blogspot. However please do not publish patterns in full or as your own, unless agreed by Kelly of lovedotty