Total Pageviews

Labels

Sunday, 22 January 2017

Mandala madness

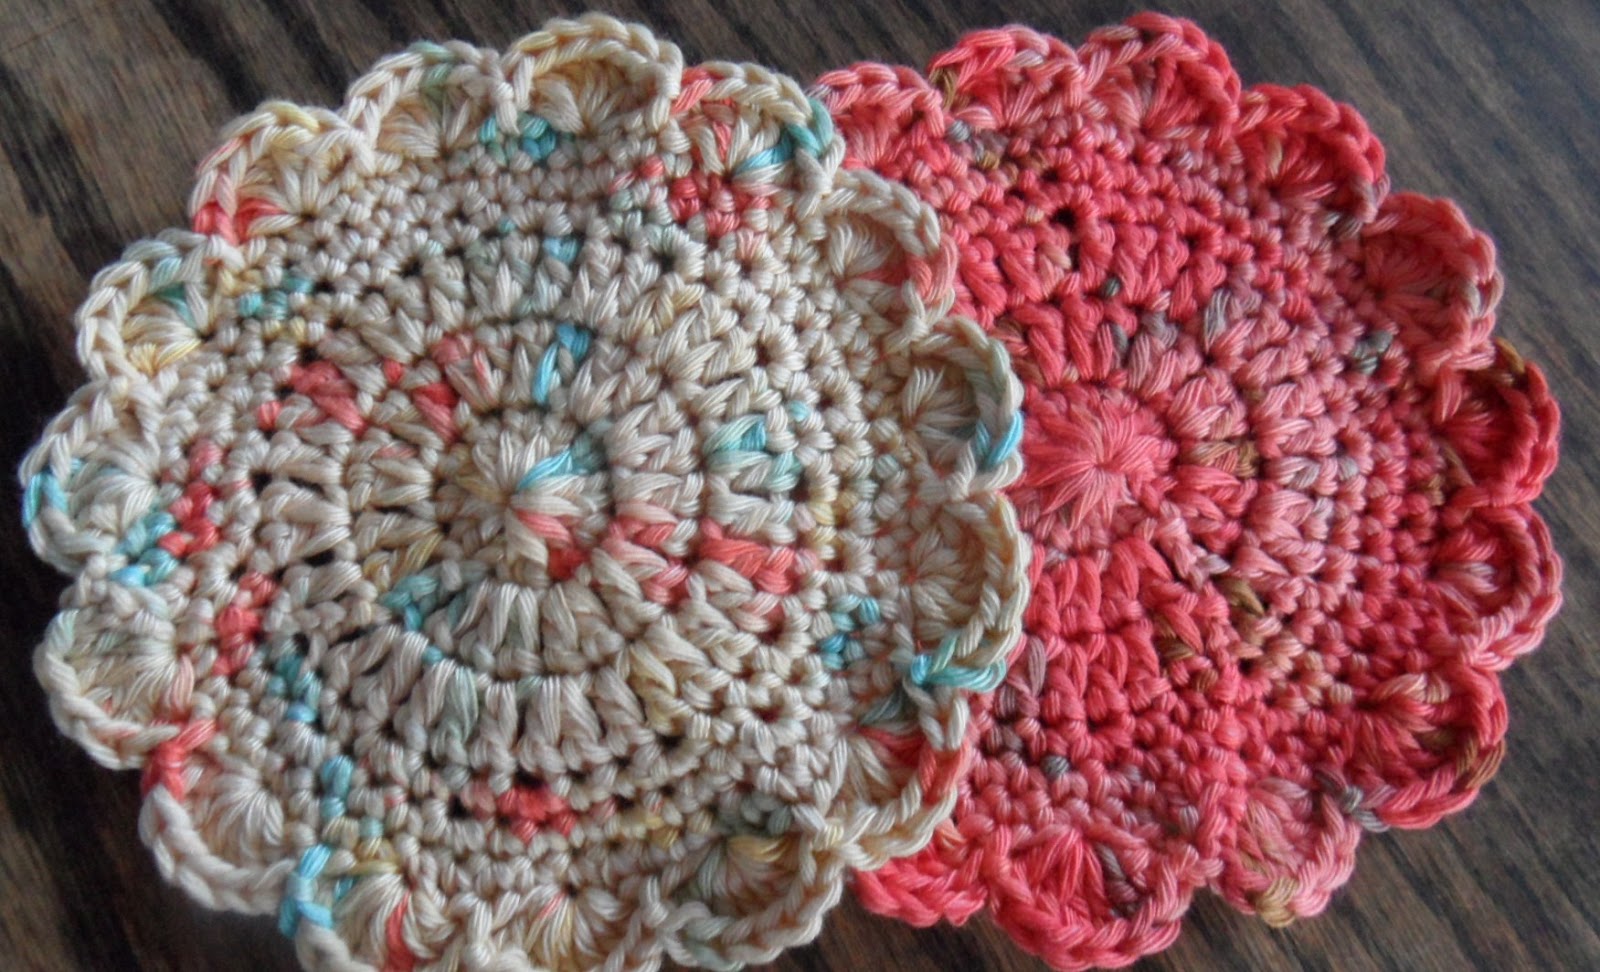
Following on from my free pattern for my Felicity Mandala, I though I would share a few of the colour combinations I have made so far. I say so far, as there is no stopping me at the moment! All these have been hooked in Stylecraft Classique Cotton DK.....

This was inspired by Cath Kidston and my kitchen (which is practically the same thing)! I have recently crocheted a cover for the shade of my lamp in the kitchen, so wanted my mandala to match that. 

Having made this one for myself, I then got obsessed and decided to make one for my mum....
So I currently have a wip for my mum for a throw for her bedroom so decided to use some of the colours to design the above mandala for her. I'm not sure she knows what to do with it, but she is used to random handmade offerings from me as she has had it for the last 30 plus years!

This one was inspired by my favourite season of spring and the beautiful bluebells that flood our garden!

I just loved these colours together, I made some baubles at Christmas in these colours and have been looking for a good opportunity to combine them again!


Lovely! Now onto the next one....
Happy hooking!
Kelly@lovedotty

© All images belong to Kelly of lovedotty unless otherwise stated. Please link to pictures, content or DIY's if used on your own website. Crochet patterns are written by Kelly of lovedotty unless otherwise stated, please link to original post if used on your own website. Feel free to sell the finished product that has been created from the pattern, if sold via a website, please link to lovedotty blogspot. However please do not publish patterns in full or as your own, unless agreed by Kelly of lovedotty

Pattern - Felicity Mandala

Pattern in UK Terminology

Hook - 3.5m

Yarn - Cotton DK Weight (I used Stylecraft Classique Cotton) in a variety of colours.

The shades I used for this particular mandala design are as follows: -
Fondant
Tropical Jade
Sunflower
Sky Blue
Busy Lizzie
Mauve


With yarn A make a magic ring and work first round into ring (alternatively you can make 2 chain and then work into the 2nd chain)
Round 1 - 4 ch (count as 1 dtr throughout pattern), 14 dtr into ring, join with a sl st into 4th ch of first st (15 sts)
Round 2 - sl st into next sp between sts, 2 ch, work tr2tog into same sp, 1 ch, *in next sp work tr3tog, 1 ch*, repeat from * to * until end of round, join with a sl st into top of first tr2tog (15 sts)
Round 3 - sl st into next sp between sts, 3 ch (counts as 1 tr throughout pattern), 2 tr in same sp, 1 ch, *3 tr in next sp, 1 ch*, repeat from * to * until end of round, join with a sl st into top of first 3 ch (45 sts)
Round 4 - 3 ch, 1 tr in next st and each st and 1ch sp around until end of round, join with a sl st into top of first 3 ch (60 sts)
Round 5 - 1 ch (does not count as st), 1 dc in same st and each st until end of round, join with a sl st into first dc (60 sts)
Round 6 - 1 ch, 1 dc in same st, skip 1 st, 5 tr into next st, skip 1 st, *1 dc into next st, skip next st, 5 tr into next st, skip 1 st*, repeat from * to * until end of round, join with a sl st into first dc (90 sts)
Round 7 - 4 ch (counts as 1 tr and 1 ch), 1 tr in same st, 1 ch, in top of 3rd tr in next group of 5 tr work 1 dc, 1 ch, 1 dc, *1 ch, 1 tr, 1 ch, 1tr into next dc, 1 ch, 1 dc, 1 ch, 1 dc into top of 3rd tr in next group of 5 trs,*, repeat from * to * until end, join with a sl into 3rd ch of beginning 4 ch (60 sts)
Round 8 - sl st into next 1 ch sp (between 2 trs), 2 ch, work tr3tog into same sp, 1 ch, *skip 1 sp, in next sp (between 2 dcs) work tr4tog, 1 ch*, repeat from * to * until end of round, join with a sl st into top of first tr3tog (30 sts)
Round 9 - Repeat Round 3 (90 sts)
Round 10 - Repeat Round 4 (120 sts)
Round 11 - Repeat Round 5 (120 sts)
Round 12 - Repeat Round 6 (180 sts)
Fasten off and weave in ends.
Blocking optional, I didn't block as they were the right shape for my tension.

© All images belong to Kelly of lovedotty unless otherwise stated. Please link to pictures, content or DIY's if used on your own website. Crochet patterns are written by Kelly of lovedotty unless otherwise stated, please link to original post if used on your own website. Feel free to sell the finished product that has been created from the pattern, if sold via a website, please link to lovedotty blogspot. However please do not publish patterns in full or as your own, unless agreed by Kelly of lovedotty

Sunday, 20 November 2016

Christmas Making

Its that busy time of year again, when all crafter's are desperately flitting between making gifts, decorations and stuff to sell. I thought I wouldn't bother with the latter this year, but then I stumbled upon crochet baubles and I am hooked! (excuse the pun)
I love them, it is so much fun planning the different colours and I think they look so Christmassy too.

The pattern is from the book 'Boho Crochet' by Marinke Slump and using my go-to cotton yarn of yummy Stylecraft Classique Cotton.

I have then topped them off with some gingham ribbon from my extensive collection!
Obviously this has meant I have got carried away and now have a surplus of baubles which is slowly taking over the house and far too many than I can fit on my own tree.

So I have listed some in my Etsy shop lovedotty if anyone fancies buying some. I think the husband is getting a bit worried he may drown under crochet makes one day, so you will be doing me a favour!
This has also meant that while I have got carried away making these, my long list of present makes is now seriously behind so I better get onto it.

Although, it really wouldn't be Christmas if I'm not up late on Christmas Eve frantically crocheting! I do like tradition!

Happy Hooking!
Kelly@lovedotty
© All images belong to Kelly of lovedotty unless otherwise stated. Please link to pictures, content or DIY's if used on your own website. Crochet patterns are written by Kelly of lovedotty unless otherwise stated, please link to original post if used on your own website. Feel free to sell the finished product that has been created from the pattern, if sold via a website, please link to lovedotty blogspot. However please do not publish patterns in full or as your own, unless agreed by Kelly of lovedotty


Wednesday, 26 October 2016

Pattern - Watermelon Coasters


Pattern in UK Terminology


Hook - 3.5m

Yarn - Cotton DK Weight in 5 different colours.
Yarn A - Pink 
Yarn B - Black
Yarn C - White
Yarn D - Light Green
Yarn E - Bright Green


With Pink make a magic ring and work first round into ring (alternatively you can make 2 chains and then work into the 2nd chain)
Round 1 - Ch3 (count as tr st throughout), 13tr into ring, join with a ss into 3rd ch of first st (14 sts)
Round 2 - Ch3, 1tr in same st, 2tr into next st and each st until end, join with a ss into the 3rd ch of the first st (28 sts)
On the next round we will be joining the black and colour changing between sts when prompted. Do not fasten off unused yarn, carry behind the work.
Round 3 - Ch1 (does not count as st throughout), 1dc in next 2 sts, *change to Black, 1dc, change to Pink, 1dc in next 3 sts, repeat from * 5 times, change to Black, 1dc, change to Pink, 1dc, join with a ss into first dc (28 sts)
Fasten off Black and continue in Pink
Round 4 - Ch3, 1tr in same st, 1tr into next st, (2tr into next st, 1tr) 13 times, join with a ss into the 3rd ch of the first st (42 sts)
Fasten off Pink and join White
Round 5 - Ch1, 1dc in each st around, join with a ss into first dc (42 sts)
Fasten off White and join Light Green

Round 6Ch1, 1dc in first 2 sts, (2dc in next st, 1dc in next 2 sts) 13 times, 2dc in last st, join with a ss into first dc (56 sts)
Fasten off Light Green and join Bright Green
Round 7Ch1, 1dc in each st around, join with a ss into first dc (56 sts)
Fasten off and weave in all ends


Blocking is optional, I found with the cotton yarn, they can easily be manipulated into shape.

Happy Hooking!
Kelly@Lovedotty


© All images belong to Kelly of lovedotty unless otherwise stated. Please link to pictures, content or DIY's if used on your own website. Crochet patterns are written by Kelly of lovedotty unless otherwise stated, please link to original post if used on your own website. Feel free to sell the finished product that has been created from the pattern, if sold via a website, please link to lovedotty blogspot. However please do not publish patterns in full or as your own, unless agreed by Kelly of lovedotty

Wednesday, 19 October 2016

Pattern - Apple Coasters

Pattern in UK Terminology

Hook - 3.5m

Yarn - Cotton DK Weight (I used a mixture of Stylecraft Classique Cotton and DMC Natura Just Cotton)
Yarn A - Cream
Yarn B - Colour (any appley colour!)
Yarn C - Brown

With yarn A make a magic ring and work first round into ring (alternatively you can make 2 chain and then work into the 2nd chain)
Round 1 - 3 ch (count as 1 tr throughout pattern), 11 tr into ring, join with a sl st into 3rd ch of first st (12 sts)
Round 2 - 3 ch, 1 tr in same st, 2 tr into next st and each st until end, join with a sl st into the third ch of the first st (24 sts)
Round 3 - 3 ch, 1 tr in same st, 1 tr into next st, *2 tr into next st, 1 tr in next st*, repeat from * to * to end, join with a sl st into the third ch of the first st (36 sts)
Round 4 - 3 ch, 1 tr in same st, 1 tr into next 2 sts, *2 tr into next st, 1 tr in next 2 sts*, repeat from * to * to end, join with a sl st into the third ch of the first st (48 sts)
Round 5 - 1 ch (does not count as st throughout pattern), 2 dc in same st, 1 dc in next 7 sts, 2 dc in next st, 1 dc in next 9 sts, 2 htr in next st, 1 htr in next 2 sts, 2 tr in next st, 1 tr in next st, 3 tr in next st, 1 tr in next st, 1 tr and 1 htr in next st, 1 htr in next st, 1 dc in next 3 sts, 1 htr in next st, 1 htr and 1 tr in next st, 1 tr in next st, 3 tr in next st, 1 tr in next st, 2 tr in next st, 1 htr in next 2 sts, 2 htr in next st, 1 dc in next 9 sts, join with a sl st in first dc of round
Change to Yarn B
Round 6 - 1 ch, 1 dc in same st and each st till end, join with a sl st in top of first dc11789087890
Fasten off and join Yarn C to top of the apple 
Make Stalk - 7 ch, 1tr in 4th ch from hook, 1 htr in next 2 chs, 1 dc in next ch, join with a sl st at top of apple.
Using Yarn C, sew two pips at each side of the centre of the apple
Sew in ends.
Blocking optional, because it is cotton, it does hold its shape well.

© All images belong to Kelly of lovedotty unless otherwise stated. Please link to pictures, content or DIY's if used on your own website. Crochet patterns are written by Kelly of lovedotty unless otherwise stated, please link to original post if used on your own website. Feel free to sell the finished product that has been created from the pattern, if sold via a website, please link to lovedotty blogspot. However please do not publish patterns in full or as your own, unless agreed by Kelly of lovedotty

Wednesday, 20 July 2016

Pattern - Country Cottage Coasters


Pattern in UK Terminology


Hook - 4mm
Yarn - Variegated Cotton DK Weight (any make, on the slightly thicker end of the scale works better)


With yarn A make a magic ring and work first round into ring (alternatively you can make 2 chain and then work into the 2nd chain)
Round 1 - 3 ch (count as 1 tr throughout pattern), 11 tr into ring, join with a sl st into 3rd ch of first st (12 sts)
Round 2 - 3 ch, 1 tr in same st, 2 tr into next st and each st until end, join with a sl st into the third ch of the first st (24 sts)
Round 3 - 3 ch, 1 tr in same st, 1 tr into next st, *2 tr into next st, 1 tr in next st*, repeat from * to * to end, join with a sl st into the third ch of the first st (36 sts)
Round 4 - 1 ch (does not count as st throughout pattern), 2 dc in same st, 1 dc in each of next 2 sts, *2 dc in next st, 1 dc in each of next 2 sts*, repeat from * to * to end, join with a sl st in first st (48 sts)
Round 5 - 1 ch, 2 dc in same st, 1 dc in each of next 3 sts, *2 dc in next st, 1 dc in each of next 3 sts*, repeat from * to * to end, join with a sl st in first st (60 sts)
Round 6 - 1 ch, 1 dc in each st until end, join with a sl st in first st (60 sts)
Round 7 - 3 ch, 5 tr in same st, skip next 2 sts, sl st in next st, skip next 2 sts, *6 tr in next st, skip next 2 sts, sl st in next st*, repeat from * to *, join with a sl st into third ch of the first st
Fasten off and sew in ends
Blocking optional but not required if tension sufficient
© All images belong to Kelly of lovedotty unless otherwise stated. Please link to pictures, content or DIY's if used on your own website. Crochet patterns are written by Kelly of lovedotty unless otherwise stated, please link to original post if used on your own website. Feel free to sell the finished product that has been created from the pattern, if sold via a website, please link to lovedotty blogspot. However please do not publish patterns in full or as your own, unless agreed by Kelly of lovedotty

Wednesday, 27 April 2016

Granny Scrap Blanket

As I have mentioned before, one of my new years resolutions is to reduce my yarn stash as it is quite frankly ridiculous (see New Years Resolutions). It is also a resolution I can actually enjoy sticking too and have had fun planning projects so far. However the one downside is, it does link to another new years resolution which is not to buy anymore yarn until I have reduced the stash - that's not so fun!
Anyway, as mentioned before (see Operation Stash Bust), I have just completed the massive stash busting project which is a granny scrap blanket and here it is......
So for this, you crochet two strands of yarn together, randomly changing colour as the yarn runs out. I used DK and crocheted them with a 7.5mm hook. This also meant it hooked up really quickly and you didn't lose interest because of the constant colour changes.
The key is to be completely random in the changes, don't even think about it, its a lot more fun that way. To me looking at it now, it is perfect and I wouldn't change any of the colours, even if at the time I might have doubted their compatibility!
I actually think it looks rather stylish and wouldn't look out of place in some posh furnishing shop (or am I getting a bit carried away!)
So I highly recommend giving a scrap blanket a go to yarn bust! The beauty is it isn't bordered so I can keep adding to it as I go
For the moment, it is living in my kitchen, although I think it may make its way outside when the weather gets nice, would make a yummy picnic blanket

Happy hooking!
Kelly@lovedotty
© All images belong to Kelly of lovedotty unless otherwise stated. Please link to pictures, content or DIY's if used on your own website. Crochet patterns are written by Kelly of lovedotty unless otherwise stated, please link to original post if used on your own website. Feel free to sell the finished product that has been created from the pattern, if sold via a website, please link to lovedotty blogspot. However please do not publish patterns in full or as your own, unless agreed by Kelly of lovedotty

Sunday, 13 March 2016

Spring in the Air!

So anyone that knows me or reads my blog will know that I adore Springtime, not only is it the season I was born, my son was born and I got married, it also contains an abundant of one of my other most favourite thing - flowers. We have had so much wintery weather lately that today was the first day I actually got that little warm feeling that Spring was on its way. I mean it is the middle of March, its about time!

The birds were out in force singing and looking for nests. In fact a lovely little blue tit couple have definitely taken residence in our bird box today. Most importantly, it wasn't raining and the sun was shining!! So I thought I would take a wander in the garden and see what flowers I could find.

First up is my most favourite flower in the whole wide world, the daffodil. I have masses in my garden, there are bulbs absolutely everywhere. Unfortunately because of the mild January a lot of the daffs came out early and are now nearing their end which makes me sad. There are three reasons I love them so much, the lovely yellow colour, they always 'look' happy (which makes me feel happy) and they are normally in their prime around my birthday at the end of March. I have to accept this will not be the case this year and there were only about 10 left in my garden, here's a few I found...
Looking back, to see early daffodils with late snowdrops back in January / February this year was a unusual but very beautiful sight. Speaking of which, I hunted the garden to see if there were any snowdrops left....and I found two little beauty's tucked away in the undergrowth...

More gorgeousness found in the garden....primroses...
Hyacinths, which actually surprised me as I wasn't aware they had flowered, showed how rubbish our weather had been that I hadn't looked in ages....
 And I love the colour of these hyacinths, I would love to find some yarn this colour. I am always on the search for pretty blues and purples but can never find the right colour....might have to start dyeing my own....
And this little lovely (tbh I'm not sure of the actual name, I'm sure my mother would tell me) was found hidden under our garden table coming out of an old potted plant. My husband spotted it while we were touring, no idea it was there or even that the plant was flowering again. I thought the plant wasn't going to flower again and had seen its better days, so I need to look after this little one...
And the blossom is still looking yummy over my pond...
  Our pond, with my pink fence which I insisted on and that my husband reluctantly painted...
So this little nature walk was giving me inspiration for more makes. Crochet and flowers are the best combination in my book. How gorgeous does my little strawberry look with its primrose friend....
Then of course I had to get my flower coasters out, these were my flower inspirational makes from last year (you will find a blog post all about it - flower coasters). These ones were inspired by marigold, daisy, aster, pansy, forget me not and sweet pea.....
The free pattern for these coasters is available on my blog, (flower coasters pattern) and I am now thinking up more flower / colour combinations!

It felt so lovely to feel the Spring in the air, I even put some washing on the line! My little boy also had a fun day in the garden, he felt the need to sort out the old flower pots from the greenhouse and lined them all up for me ready for planting....I didn't even ask.....
Fingers crossed this means Spring is arriving and we can all look forward to the yummy crochet inspiration it always brings. You can certainly watch this space for that!
Happy hooking
Kelly@lovedotty
© All images belong to Kelly of lovedotty unless otherwise stated. Please link to pictures, content or DIY's if used on your own website. Crochet patterns are written by Kelly of lovedotty unless otherwise stated, please link to original post if used on your own website. Feel free to sell the finished product that has been created from the pattern, if sold via a website, please link to lovedotty blogspot. However please do not publish patterns in full or as your own, unless agreed by Kelly of lovedotty

Sunday, 28 February 2016

Operation stash-bust!

So I am currently working on busting my stash of yarn so that I can clear some space (ahem......who am I kidding, it is so I can buy more obvs!) Currently my yarn is stuffed into a cupboard and to give you an idea of how much there is, you have to properly lean against the door and slam it shut. My husband made the comparison to a scene from The Shining, the one where the lift doors open and blood spills out, except in my case it is yarn. I can kinda reluctantly see his point.

The key to stash busting, when you have a lot of yarn like I do to get through, is quick and easy wins so my current idea was this gorgeous technicolour dream blanket of many colours:-

So this is 2 pieces of double knit yarn crocheted together to make a giant granny square with a lovely chunky 7mm hook, changing the yarn as you go. I decided my colour changes would be completely random and so far I am absolutely loving the colour
journey. It is keeping my interest as I look forward to the next colour combination. I am already planning my next one!

I hope you like it, I will post a completed picture when I am done!

Happy hooking
Kelly@lovedotty
© All images belong to Kelly of lovedotty unless otherwise stated. Please link to pictures, content or DIY's if used on your own website. Crochet patterns are written by Kelly of lovedotty unless otherwise stated, please link to original post if used on your own website. Feel free to sell the finished product that has been created from the pattern, if sold via a website, please link to lovedotty blogspot. However please do not publish patterns in full or as your own, unless agreed by Kelly of lovedotty

Thursday, 11 February 2016

Pattern - Mini Valentine Hearts


Pattern in UK Terminology

Hook - 3.5mm

Yarn - Any 4ply or DK weight Yarn,
I used Scheepjes Catona, 4ply 100% cotton yarn


Make a magic ring

Round 1 - Ch3 (counts as 1 tr), 11 tr into ring, join with a ss in top of beginning ch-3 (12 sts)

Round 2 - 1 ch (does not count as st), (1 dc, 1 htr) into same st, 2 ch, 1 htr, 1 dc) into next st, 2 dc in next st, (1 dc, 1 htr) into next st, (1 htr, 1 tr) into next st, (1 tr, 1 dtr) into next st, 3 dtr into next st, 2 ch, ss into same st, ss into next st, 2 ch, 3 dtr into same st, (1 dtr, 1 tr) into next st, (1 tr, 1 htr) into next st, (1 htr, 1 dc) into next st, 2 dc into next st, join with a ss in top of first dc.

Fasten off and weave in ends


© All images belong to Kelly of lovedotty unless otherwise stated. Please link to pictures, content or DIY's if used on your own website. Crochet patterns are written by Kelly of lovedotty unless otherwise stated, please link to original post if used on your own website. Feel free to sell the finished product that has been created from the pattern, if sold via a website, please link to lovedotty blogspot. However please do not publish patterns in full or as your own, unless agreed by Kelly of lovedotty